Below are some screen shots of the music channels I used:

I learnt that cinematography is usually very similar with slight
exceptions depending on the genre of music and the form of the video. The three
main types of camera shots that are used in every video are close ups, medium
close ups and long shots. Close ups and medium close ups are used to see the
emotion and facial expressions of the artist; the lyrics that they are singing;
makeup and hair styling and detail in a prop that is been used such as the
guitar in my video. I used a lot of
these shots throughout my music video as it is an emotional song and these shots
allow that to be portrayed.

Long shots act as establishing shots which bring context and
understanding to the video and also allow us to see a dance routine or performance
if one is featured in the video. I used long shots in narrative sequences of my
video. Over the shoulder shots are used less regularly but they can show the
perspective of the artist as do point of view shots. I used an over the
shoulder shot in my video to watch the protagonist looking at pictures of him
and his lover when they were happy together. Two shots and wide shots can be
used to show dancers or a band performing. The shot that I used that could be
described as a two shot was of the artist playing his guitar and the whole
guitar was in the shot. His hands were in the places where two different people
would be in a conventional two shot. Another two shot that was also a long shot
was of the couple walking towards the sea.

Camera movement is an important way of making the music video flow
from one shot to another. Pans can act as another way of giving us a point of
view shot or including the location and emotion in the shot which a still image
may not be able to do. They also allow other people to be in the shot. I used a
pan in my video around the protagonist’s head on the beach. I started off with
the camera around the front of his head and gradually moved to the back of his
head so the audience could see he was starring out to sea in a moment of
sadness. Zooms are effective in making the shots flow but they also act as a
way of seeing more emotion in a character for example when the camera zooms in,
or allows us to see more of an action or
location when zooming out. I used a zoom in the urban location after the
protagonist slid down the wall and put his head in his hands. The zoom in this
shot indicated that the character was really upset and it drew more attention
to this fact. Zooms can also be used to
show positions of authority if it’s a song about gangs etc just like high and
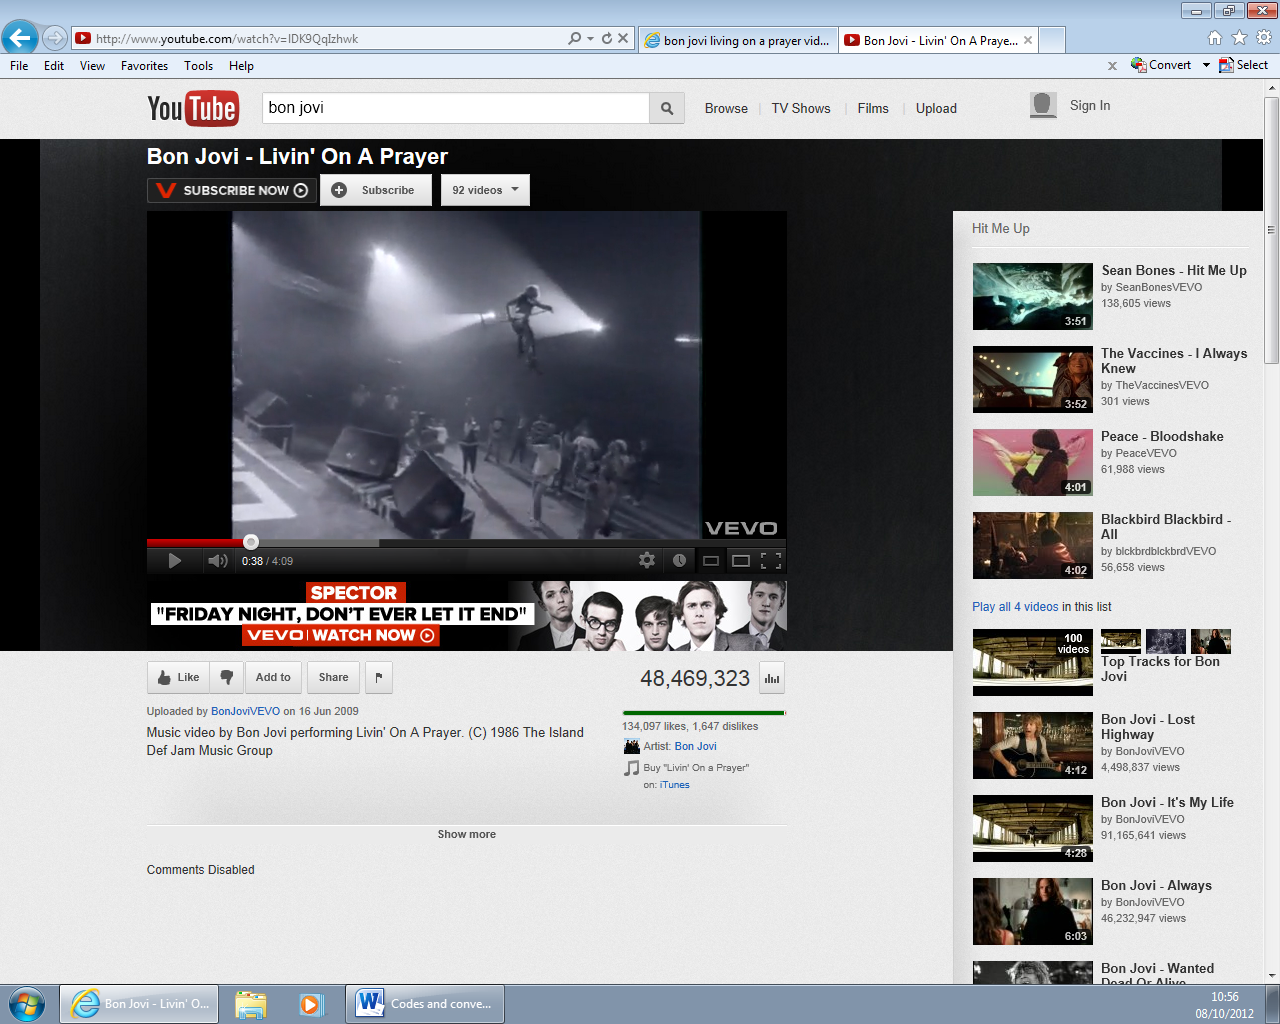
low angle shots can be. Crane shots are a common occurrence of performance
videos as they are good for hovering above the stage and also including the
audience in the shot: arial shots can also be used in a similar way. Below is an example of one in a Bon Jovi video:
Tracking
shots are popular but they are used differently in different genres. A pop
video that would arguably be for a younger audience and has connotations of
being more “clean cut” would generally use a dolly so that the shot is steady
like whereas when I watched more indie or rock videos, the camera work is done
using steadicam so that the shot is more natural. A lot of tracking shots are
used in the genre of indie and rock as there seems to be a lot of walking scenes
or moving scenes. The steadicam may be used more often in these genres as the
songs are ‘rougher’ and it works better as visual imagery. I used a lot of
tracking shots in my video and they were all filmed without a tripod and I think
that the slight wobble of the shot looks better in the walking scenes.
Continuity
editing and montage editing are the two main types of editing and generally
they are both used in most videos. Montage editing allows lots of different
things to be going on in the video and can allow a story to be told whereas
continuity editing is better for dance routine videos and giving an emotive
performance. I found that continuity editing was used a lot more in the genre
of my Beyoncé video, pop/R&B because those songs kind of songs require a
performance. Quite a lot of the videos I watched in the indie genre often don’t
include any form of performance and are all narrative like Ed Sheeran’s actual
video for ‘Give Me Love’. This means that the videos rely heavily on montage
editing which follows a narrative. I like a lot of these videos but I think the
videos that contain both continuity and montage editing such as Ben Howard –Old Pine are the best ones as you get to see the artist performing as they
enjoy doing and see a narrative too. Editing jump cuts into a video is a good
way of moving from one scene into another or making something seem more
dramatic. I have used one in my video when the protagonist is “fighting his corner” (1:12) and I think that it was a good transition from a long shot to a
mid-shot but also made the visual imagery seem more aggressive for that lyric.
I think it works well and follows the conventions.
Super imposition is
something that can be included using different extremes such as just changing a
background behind an artist after filming it in front of a green screen or
using CGI to super impose animals or even people that would not have been there
during the original filming of the video. I found super imposition to be more
conventional to videos that were found in the pop genre.

Mise-en-scene is what makes the video unique and this is where the
genres are definitely identified. Costume and makeup is very important for
giving the artist their image, as a rock star would not want to be placed in a
glittery dress and bright red lip stick. The costumes are what most people in
the audience are going to relate to so the clothing and makeup artists need to
make sure they get it right. When I was making the ‘I Was Here’ video I found
it difficult to ensure the costumes were what was expected of an R&B song
and I think the fact it is a slow song made that harder. I knew in the
performance aspects on stage that my artist needed to be really dressed up but
it was in the narrative shots that I found it difficult to decide on an outfit.
My Give Me Love video was very easy to follow the codes and conventions of
costume and makeup as there isn’t really any specific dress code. I found that
in the videos that I watched of male solo artists in the indie genre just wore
jeans and a t-shirt or something very similar. This was easy to recreate. The
lighting is dependent on the type of video that is been shot. Pop and RNB songs
are usually brighter and “fluffier” because the songs are usually happy and up
tempo but if it is a ballad the colour schemes and lighting are often calmer as
this helps the audience know how to feel. Indie music videos tend to have a
middle ground. There are often black and white shots throughout a video so
lighting isn’t that important but most of the lighting is just natural. The
location of the music video is usually determined by the genre of song. To make
the video as conventional as possible it is important to shoot the video in a
suitable place. “The Captain” by Biffy Clyro is filmed on what looks like a
pirate ship and it also contains scenes of dungeons. It is quite an aggressive
video but that matches the aggressiveness of the song. The tempo and the
aggression would not be portrayed well if the video was filmed in a dance
studio because the image would be clean cut and the song would be the complete
opposite. The lighting in the video is very dark with a lot of bright flashes
which occur at the same time as the drum beat. The singer in the band is also
very “rocky” with his tattoos all over his body, black hair and he is sweating
quite a lot which is what you assume
to happen at a rock concert.

A lot of indie songs are just located in the
streets. Most contain walking or driving scenes in an area that could be seen
as an everyday location. A good example of this is 'Chocolate' by The 1975.
The sound in a
music video is usually very simple as it contains the lyrics of the song but
some music videos have a narrative voice over at the beginning, end or both in
which more information is given about the song or narrative within the video.
Sound effects can also be a feature of a music video but these are very
specific to certain genres and usually feature more in animated videos. Volume is
another area of the sound that can be manipulated in a music video as there may
be dialogue over the song and therefore it is lowered. Some artists also like
to feature bits of the original recording in their video with means that sound
quality is different.
Typically Ed Sheeran does not feature in his own music
videos for example in 'The A Team', his biggest hit. In the music industry, especially with main stream artists, is
very uncommon but within the indie genre it isn’t as unheard of. Some artists
in this genre are in their videos but they are just narrative videos and do not
include any lip syncing at all. I have followed the conventions of most music
videos to include the artist in the video. Also choosing to put the artist in
my own video meant that it was very different to Sheeran’s videos which meant I
could be more original and not use shots from his videos that I had seen. When
I was making the video for the Beyoncé track, I had chosen a song without a
video for this same reason. On saying this I have used similar camera angles, shots
and transitions to what are used in Ed Sheeran videos and it is clear what
genre my song is from because of the techniques I have used like including the
guitar as a prop and this performance aspect.
Before I made my magazine advert, I searched Google to
see what the codes and conventions of a magazine advert were. I found that
there were two main ways to have an image on the advert. The first way was to
just have a large image of the artist that filled the whole page of the advert
and have the text at the side.

The
second way included using the album covers in the middle of the page with a
blank space at the top of the page and the information about the release of the
album at the bottom of the page.


I
also discovered that there isn’t much text involved on the advert. All that is
needed is the release date, where to buy the album from, a piece of information
about the album whether it is a song title or the fact it’s a debut album, in
what format the album will be available and ratings from magazine institutions.
There is often a link to the official website of the artist and the logo of the
record label too. This is how I set out my magazine advert:

All of the artist websites that I looked at were slightly
different to one another but they did follow similar codes and conventions. The
first thing that I noticed is that most of them had an image of the artist at
the top of the page and this was in the form of either their album or single
cover, an upcoming tour or promotional package or a photograph from a past
photo shoot. This is how I decided to use the image of “Chris Mallette” at the
top of my website. Depending on the genre of the music the artist was producing
was dependant on what colours were used for the website. Looking at pop artist’s
websites such as Justin Bieber and One Direction, they were very bright and colourful
whereas indie websites looked calmer as they used fewer colours and they were
usually darker. I took this into consideration when I was creating my own website
which is why I decided to use black as the main colour on my website.

The information I found out from looking at the websites
about the pages of the website were very valuable. This is how I knew which
pages I should include and what I should call them. On the template of the
website on Wix there were a few already existing pages but I added more such as
the store because I knew they were important features for an artist’s website. On
average there were eight pages on the websites that I looked at.
They included
pages such as news, about, gigs, store, music, photos, blog and contacts. These
are the main pages that I incorporated onto my website but some artists had a
whole page dedicated to their social networking sites, a blog page and a
signing up page where people could sign up to the website and they would receive
emails about all of the latest things that go up on the website and what the
artists are up to. I liked this idea but because my artist isn’t real I thought
that would be very difficult to re-create.
On the homepage of the artist’s website I noticed that it
included information from most of the other pages on the website and that it
came under headings. Sometimes the page was split into columns and other times
the information would just be listed under one another. There were also a lot
of advertisements on the homepage, especially at the top as this is the most
important page, the page that everybody who logged onto the website would see
first. Many of the artist’s latest music videos or released songs were at the top
of the page and the first thing you would see after the image of them and the
options of the pages. This is why I put my music video and album advertisement
where they are because they are in the most important spot. The homepage also
includes some of the latest things that the artist has done under the title ‘Latest
News’ which is another reason why I used this n the homepage.
Overall I think I stuck to the codes and conventions of
all three mediums very well and although I did make some changes such as
putting the artist in the video to an Ed Sheeran song I feel that I have
justified those decisions.
How effective is
the combination of your main product and ancillary texts?
Overall I am very pleased with how my music video and two
accompanying ancillary texts, a website and magazine advert have
used cross-form synergy which reflect a professional media campaign.
When I first listened to the track ‘Give Me Love’ I realised that the use of the guitar was very prominent and that as an artist Ed Sheeran prides himself on writing all of his own material. I wanted to create an artist similar to this so I followed this theme throughout my own products. In the video I decided that my artist would play the guitar whilst singing for a good proportion of the song as it emphasises that he is a song writer and likes to play the instrument himself. I felt this was an important part of the ideology of Ed Sheeran and “Chris Mallette”.

When I first listened to the track ‘Give Me Love’ I realised that the use of the guitar was very prominent and that as an artist Ed Sheeran prides himself on writing all of his own material. I wanted to create an artist similar to this so I followed this theme throughout my own products. In the video I decided that my artist would play the guitar whilst singing for a good proportion of the song as it emphasises that he is a song writer and likes to play the instrument himself. I felt this was an important part of the ideology of Ed Sheeran and “Chris Mallette”.

I used the guitar theme on my website too. The main image
at the top of every page has the artist looking down at his guitar as he plays.
There are also many images like this on the ‘Gallery’ page of the website;
videos of Mallette playing the guitar and clothing with guitar images printed
on them with his name. On his Twitter account I have posted things about him
playing his guitar which is hooked up to his website along with photos from his
Instagram account. In some of the first edits of the magazine advert, I had use
the same image as I have at the top of the website but due t the awkwardness of
the size of the guitar in the image I decided to change this picture to an
image from the same shoot just without his guitar. This means that artist is
wearing the same clothing as he is in some of the pictures on his website and
that image is also uploaded onto his website before I edited and made it black
and white.

The black and white theme is very consistent throughout the media package. In the video I have used a black and white effect on the narrative shots which emphasise the loneliness of the male in the video and allow the audience to connect with the character. The use of the black and white on the website ties in with the codes and conventions of existing artist website whereby indie bands or artists use one block colour, predominantly black. I think the black and white effect on the website makes it look more professional and the white against the black background makes the text clearer. The reason I chose to make the magazine poster black and white was because I wanted the album cover to portray the same emotion as the narrative aspects in the video. I think it says to the audience that it is going to be an emotional album with great songs on it and I think the red writing on the cover stands out and gives it character that is maybe lost by the image being black and white.

I decided to conduct my audience feedback by videoing people after they had watched my music video and looked at my ancillary texts.

The black and white theme is very consistent throughout the media package. In the video I have used a black and white effect on the narrative shots which emphasise the loneliness of the male in the video and allow the audience to connect with the character. The use of the black and white on the website ties in with the codes and conventions of existing artist website whereby indie bands or artists use one block colour, predominantly black. I think the black and white effect on the website makes it look more professional and the white against the black background makes the text clearer. The reason I chose to make the magazine poster black and white was because I wanted the album cover to portray the same emotion as the narrative aspects in the video. I think it says to the audience that it is going to be an emotional album with great songs on it and I think the red writing on the cover stands out and gives it character that is maybe lost by the image being black and white.

What have you
learned from your audience feedback?
I decided to conduct my audience feedback by videoing people after they had watched my music video and looked at my ancillary texts.
Something else I used to conduct my audience feedback were social networking sites such as Facebook and Twitter where I shared my video with my friends and followers and they were then able to give me their opinions on my work. It has been easier to get feedback in this way as I haven’t had to get people to sit down with me and they can view the video in their own time.

Audience feedback - Jill by Jennn Wilson on GoAnimate
Animated Presentations - Powered by GoAnimate.
An early piece of feedback that I got was in January, five months into the academic year, when I had only filmed one set of lip syncing for my final video. I uploaded what I had done onto my editing suite and lined the shots up with the music the best I could. Once I had done this I watched it through but I wasn’t happy with what I saw. I showed a group of my friend’s and one of them said to me no matter how accurate my editing was, it would never be lip synced properly because the words hadn’t been sang correctly. The other people who viewed the video said similar things and told me to re-shoot what I had already filmed. This discussion is what made me decide to change the song and my actor so I could get some work done rapidly as I was falling behind. This discussion also lead to the idea that I filmed in New York when I visited with college in February. A lot of basic ideas were formed but on reflection it would have been very difficult to film in my spare time in New York and it would have made the trip less enjoyable. I did film a few location shots; one from the top of the Empire state building and some of yellow cabs but I have decided not to use them as although it would be great to have something unique in my video, it wouldn’t tie in to the rest of the shots that make up the rest of the video.
Below is a Prezi that I created when I needed to make the decision on what my next step was going to be to get my video done:
Soon after I got back from New York I filmed my first lot of footage for my new video and I decided a still background behind my artist would be a good way to film the performance shots. Once I had filmed the artist I downloaded the footage onto my editing suite and edited it into the song. When I showed my peers they said that they thought it would look better if the artist was walking through an urban area or in a location with a lot of scenery. I decided to go out the following weekend and re-shoot this footage. I went into college over the Easter holidays to edit my new footage and found that they were right, it did look a lot better with the new moving footage. There was also a lot more going on in the shot which I liked.
I have had a mixture of feedback from my audience so far, a lot of positive comments and some constructive comments on how I could improve or change certain aspects of my video. Overall people think that my chosen protagonist’s acting is good and a believable performance and he portrays the distressed and emotional character very well throughout the video. One of the people I have videoed though believes that he could have shown his emotion better and he thinks that is what could be changed about my video. They feel that I have succeeded in creating visual imagery that matches the genre, theme, and tempo of the song and my choice of long, slow shots and camera angles and editing techniques work well. A lot of people have said they like the editing that happens in the beach scene when I changed the opacity of the woman so the man was left walking on the beach on his own. Another thing that some people have mentioned changing is the lip syncing shots in the urban area. Some people are saying that the protagonist looks too cold so to improve the video those shots could be re-filmed. I would agree with them on that point.
Towards the time I created my final edit of my video, I was unsure whether to include a narrative sequence at the beginning. This shot would have included the lover kicking the protagonist out of her house and slamming the door on him. There was no speech involved in the shot, just the sound of the characters struggling and the sound of the door slamming. The first cut that I made was just after the lover had walked out of the shot. I asked a few people what they thought of it as I was unsure and most liked it. One person suggested that I made the cut as soon as the door war shut. When I tried this, the image was good but the sound that accompanied it wasn’t right because as the lover had slammed the door whilst filming, she lifted the handle to lock the door and it cut halfway through that sound. Due to this, the fact that I wasn’t sure if it worked and some unsure comments from the audience I decided to cut this out of the final edit which is a shame because it added to the narrative of the video but I think this decision was for the best.
One shot that I have had a lot of problems with throughout the process of editing is the ‘alcohol’ shot which appears in the first verse of the song. From the beginning of the planning process I wanted to create a shot which included the protagonist sat watching television looking depressed, with the light from the television flashing on his face as he ate pizza a drank or was drinking a lot of alcohol. The first time I shot this it was pitch black outside, the curtains were shut and there was only the light from the television lighting up the room. When I uploaded this shot onto my editing suite, the effect of the television was very clear but when there was something on the screen which was darker, it was hard to see my protagonist. It was clear to me it needed to be brighter in the room and also some of my peers. I reshot this bit of filming at dusk with the curtains open and the settee pulled closer to the television so it would be brighter on the protagonist’s face. From what I could see on the camera it looked as though it was bright enough but again when I got the footage onto the editing suite, it was too dark. I shot the footage a third time and this time I made sure it was still light outside. This allowed me to manipulate the lighting in the room by closing certain curtains. These shots were finally bright enough to use in my film although as it was a lot brighter it is hard to see the effect of the television on the protagonist and the walls. My peers and audience agree that it is better now the shot is brighter, it’s less grainy. One peer asked what the flashing was and thought a photograph had been taken during filming with the flash on which isn’t as positive but I still wanted to use the shot in my final edit. I think the sequence fits with the lyrics of the song very well.
The following videos are what I think I of my three media texts, how I would improve them and the shared elements they have to produce cross-form synergy:
How did you use
new media technologies in the construction and research, planning and
evaluation stages?
I began the whole project by watching videos on YouTube, my iPod and on Sky music channels such as StarzTV, NME and ChartShowTV. Originally I wasn’t sure which type of video I wanted to make and I was between making asoap trailer and the music video. After watching the videos of my initial research I decided I would make a music video because I wouldn’t have to rely on as many people to be available to be in my film. On reflection I am glad I made this decision following my casting problems just for the one role in my music video. When I had made this decision I then focussed on watching music videos of all different genres to decide what genre I wanted my music video to be in and what the different kinds of music videos were.
The next step consisted of me using Sky+ to record some
music videos that I could watch and choose one to create a one minute
storyboard of. After watching various options I decided to create the
storyboard for Gym Class Hereos – The Fighter. I decided to use Sky+ instead of
YouTube because often YouTube takes a long time to load and it is awkward to
find the points you were last watching because you have to drag the curser
back. Using the recording system on Sky+ meant that it was easier to rewind the
video if I needed to, it was on a bigger screen and the video was better
quality on a television screen.
I narrowed my song choices down to two songs: Pixie Lott– Gravity and Beyoncé – I Was Here.
Once I had done this I used Google to find out more information about the two
songs and the artists. I looked at their official websites and other sites that
were giving me information about them and wikipedia for the bits that I couldn't find on their website. This was a very important process
because it allowed me to know what the artist’s life experiences and what the
songs could possibly be about.

Doing this research allowed me to have a greater understanding
of what emotion I would have to portray in my own music video. I also
researched the lyrics of the two songs and annotated them with my own ideas.
Beyoncé - I was Here


Pixie Lott - Gravity


I
used lyricsuniverse and then also confirmed the lyrics by listening to the music
videos and reading the book with the album cover as I have both of their
albums. This was the time that I thought of most of my ideas. The reason I
looked at the lyrics in so many different ways is because I didn’t want to trust
the websites in case they were wrong. After doing this for both of the songs I
decided that I wanted to make my video for the Beyoncé song because I thought
there was more potential in the lyrics; that I could film a better video and
that the ideas in my head were stronger than those for the Pixie Lott song. I
could also relate to the lyrics better than in the other song. I also videoed a few of my friends telling me what they think the song is about and what they would put in the video.
Now I had my
song choice I was able to begin investigating who the audience of my I
needed to know who my audience was and what they were interested in. I felt
that recording people using my iPhone was a much better way of doing this than
making a questionnaire and asking them to write down their ideas. I asked them
numerous questions about themselves. It also allowed me to use my YouTube
account for the first time so that by the time it came to posting up my music
video I would know how to log in to my account, how to get on to my channel to
upload my video and the setting I would have to change to make sure the video
could be shared.
I was able to use all of this information to produce my audience information along with polls that I created on my blog that I had asked people to fill out for me so I could find out about even more people.
I then used Microsoft Excel to create pie charts of all the information I had found out which I then cropped and posted onto a Microsoft PowerPoint slide. Along with the pie charts I used Google images of all of the things that my audience had mentioned in the interviews. I was then able to place all of these onto one slide and post it up onto my blog.

To get my
performer I asked my friend Hannah who I knew was a successful actress at her
drama school and she is also a singer with a lot of great interests that I
could use to my advantage in my video. Her initial thoughts were that she would
think about the proposal to see if she would be able to manage her own work
load and what I would need her to do. I sent her an email with a link to a
lyric video of the song and my official lyrics page that I knew contained the
correct lyrics.

After she had seen the email, which I had sent to her using my
college email, she came to the conclusion that she was able to be in my video
for me. I was very pleased with that response. SDhe signed a commitment agreement for me to prove that she was dedicated.

When I created my own storyboard for my video I used Google images again
to gain some ideas on how to create images as I am not good at drawing.

Once I
had drawn all of the images and created my storyboard (Beyoncé and Ed Sheeran) used my Epson scanner at home to transfer those
images onto the computer and saved them as JPEG files.

I copied the images onto
Microsoft PowerPoint and cropped the full image to get rid of all the writing
on the pages. I then saved the individual images as JPEG files and uploaded
them all onto Movie Maker along with the MP3 music file. This allowed me to
order the images and cut them to the music to create an animatic. Once my
animatic (Beyoncé and Ed Sheeran) was complete I uploaded it onto my YouTube account like I had done
with my other videos and shared the video to my blog.
As part of a college task, me and a group of my classmates had to recreate a music video using one of the storyboards from the group that had been created over the summer. Mine wasn’t used because it would have been very difficult to find a gymnast that was able to be in the video for us. We created a Florence and the Machine video for "Rabbit Heart". This allowed us to learn how to use the college cameras; how to set up a filming environment including a tripod, props, mise-en-scene etc and allowed us to use the editing suites for the first time. I thought this project was very useful and it was an insight into how much work we were going to have to do over the year.
This is our finished product:
The next thing I
did was start filming. When the project started my parents bought me my own
video camera so I would be able to film whenever I needed to so I didn’t have
to rely on camera being free for my use at college. Before I got the camera
though I went to see our college camera technician Ray and found out what
cameras he used in college. I was then able to buy the same camera so that I
knew it would work on the editing suites and would be the same quality as
everybody else’s in the department who had used a memory card camera. The
camera is a Sony HD handycam HDR-CX190E with 5.3 megapixels.

I really like the camera. It is a high quality camera with a good zoom and it is very small which makes it very portable. Also the fact that it uses and SD card meant that I could manipulate the amount of memory it had (I bought a 16GB memory card) and that meant I could go out filming for longer. The one thing I don’t like about the camera is the battery life. Because I used the camera on the highest HD setting it meant that the battery life didn’t last very long and there were a few times that I had to cut filming short and go back to the car to charge up my camera before we could carry on. Overall the camera has helped me create a good final music video.

I really like the camera. It is a high quality camera with a good zoom and it is very small which makes it very portable. Also the fact that it uses and SD card meant that I could manipulate the amount of memory it had (I bought a 16GB memory card) and that meant I could go out filming for longer. The one thing I don’t like about the camera is the battery life. Because I used the camera on the highest HD setting it meant that the battery life didn’t last very long and there were a few times that I had to cut filming short and go back to the car to charge up my camera before we could carry on. Overall the camera has helped me create a good final music video.
Whilst I was
filming I took still photographs of the locations and evidence that I myself
was shooting my footage. To get these stills to put into my planning I used my
Panasonic Lumix FS30.

This camera is a good camera for taking images such as the ones for my planning but the quality of the images were not good enough to use for my ancillary texts as they were grainy and impossible to edit on Photoshop. The portable size of this camera again made it easier for me when I was filming because it wasn’t a big bulk camera that I had to carry around with me and the fact that I had photo evidence of what I had done helped me when it came to writing about my filming days.

This camera is a good camera for taking images such as the ones for my planning but the quality of the images were not good enough to use for my ancillary texts as they were grainy and impossible to edit on Photoshop. The portable size of this camera again made it easier for me when I was filming because it wasn’t a big bulk camera that I had to carry around with me and the fact that I had photo evidence of what I had done helped me when it came to writing about my filming days.
To take the
images for my ancillary texts I used my camera which is a Nikon CoolPix L180
with 26X wide optical zoom and 16 megapixels. This camera produces very high
quality photographs which are easy to manipulate.

I used Adobe PhotoShop CS5 extended to do this. When taking the images I used a plain cream wall which I found in the college green room where I wouldn’t be disturbed. There was also the advantage of the portable lighting in there. I lit my artist with small lights at both sides of his face and a larger, brighter light in front of him. When I uploaded the images onto the computer I noticed that the images were quite yellow. I was able to manipulate this in PhotoShop using the colour blending tools. I managed to keep his shadow in the image which I think gives a great effect especially when I made the image black and white.

I decided to make the image black and white because I was finding it difficult to create a background that was fit in with the colours in my artist’s shirt and it wasn’t looking professional. I used tools such as the spot healing tool to make my artist’s skin look clear.

I used the scaling tool to change the size of the image. I moved the image around the page a lot and initially the image was a mid-shot. I think the medium close up looks a lot better especially as it is only half of the face; I think this is a good effect. I used the text tool to make the title of the album and other texts to advertise the release date of the album. I used the colour tool to change the colour of this and I decided on red because it stood out against the faint background. I also used the stroke tool and drop shadow tool to make the text bigger and make it stand out more.
 The iTunes logo,
Atlantic logo and Parental advisory images were all from Google images that I
cropped and posted on the bottom of the advert so that people know who he is
signed to and where to get his album from.
The iTunes logo,
Atlantic logo and Parental advisory images were all from Google images that I
cropped and posted on the bottom of the advert so that people know who he is
signed to and where to get his album from.

I used Adobe PhotoShop CS5 extended to do this. When taking the images I used a plain cream wall which I found in the college green room where I wouldn’t be disturbed. There was also the advantage of the portable lighting in there. I lit my artist with small lights at both sides of his face and a larger, brighter light in front of him. When I uploaded the images onto the computer I noticed that the images were quite yellow. I was able to manipulate this in PhotoShop using the colour blending tools. I managed to keep his shadow in the image which I think gives a great effect especially when I made the image black and white.

I decided to make the image black and white because I was finding it difficult to create a background that was fit in with the colours in my artist’s shirt and it wasn’t looking professional. I used tools such as the spot healing tool to make my artist’s skin look clear.

I used the scaling tool to change the size of the image. I moved the image around the page a lot and initially the image was a mid-shot. I think the medium close up looks a lot better especially as it is only half of the face; I think this is a good effect. I used the text tool to make the title of the album and other texts to advertise the release date of the album. I used the colour tool to change the colour of this and I decided on red because it stood out against the faint background. I also used the stroke tool and drop shadow tool to make the text bigger and make it stand out more.
 The iTunes logo,
Atlantic logo and Parental advisory images were all from Google images that I
cropped and posted on the bottom of the advert so that people know who he is
signed to and where to get his album from.
The iTunes logo,
Atlantic logo and Parental advisory images were all from Google images that I
cropped and posted on the bottom of the advert so that people know who he is
signed to and where to get his album from. 
On the editing machine I have used Adobe Premier which is a great programme to edit on because it is accurate to 1/25 of a second, allows you to use a lot of layers so you can build images up on top of each other, allows undoing of editing and edits things in real time so you don’t have to wait for a long time for an effect to be in your video. I think this programme is easy to use especially as I have never edited a video before until I had to make this video.

Uploading the clips onto the machine was easy and reasonably quick if there wasn’t much footage on the memory card. I uploaded the footage into my video file and once the footage was on the machine I was able to import the files onto the editing programme. I then went through all of the clips in the folders and renamed them so I knew where all of my clips were when I needed to use them. The MP3 file was the first thing that I uploaded onto the editing suite and I locked this layer throughout the process of my editing so that I could not accidently change the song or put some sound from the clips into it that I did not want to be there.
Cutting the film so it was in time with the music was one of the most difficult and time consuming things to do. A lot of the time I just used the cropping tool to cut the clips but I also used the razor tool at some points too to make sure they were cut perfectly. The first clip that I put with the music was a full version of the song. I played around with this until it was lip synced perfectly by using the zoom bar at the bottom of the screen which allowed me to zoom right in to edit the video and see clearly where the cuts needed to be. I was then able to add the other clips onto other layers so I didn’t affect this already edited piece of footage. I chose to start my editing this way so that I always knew I had lip syncing in the song.
The next step I took was watching the full video through and identifying which clips weren’t right and needed to be replaced and these were added to the second layer of video. Once I had edited those into place I could then drag the better clips on top of the clips that needed to be replaced which automatically wrote over the old clip and deleted it. The fact that Adobe Premier allows undoing was perfect because sometimes when I watched my editing back it needed to be changed and I was able to do that without starting the whole process again.
When editing the narrative shots I noticed that I had filmed them either too fast or too slow. To edit this I used the rate tool which allowed me to speed up and slow down the clips as I wished. One the performance and narrative clips were all edited into places I was happy with I was then able to add effects.
The biggest effect involved in my video is in the beach location where the couple are walking together and then the female fades out. This involved changing the opacity of the clips and arranging at what point the girl would fade out. Also the two shots were slightly out of line with each other so I had to move the clip of the male on his own to the left of the screen and make him larger. This then meant that the clip wasn’t the full size of the screen so I then had to stretch the clip. This was a long and annoying process but once it was done I think it creates a great effect.

I also change the opacity of the candle scene which appears faintly in the background whilst the artist is playing the guitar.

I also decide to make all of the narrative clips black and white to emphasise his loss (like in the image above where the couple are on the beach before she fades out). This involved me simply selecting all of the clips individually and changing the colour settings in the video effects. When the video was finished it was then exported as an MP3 file and uploaded onto YouTube and shared to my blog.
I used the
website Wix to create my website as my second ancillary text. I found this
website really easy to use and really enjoyed the process of using it although
I had to do most of the work on my website at home as the college internet
didn’t allow everything to function properly on the website and it was very
slow. Even now the website is published it is still temperamental at college.
The first thing
I did was sign in using my college email. When I got onto the website though
and had selected the music website template I wanted to use, I realised that
the web address when the website was going to be published would include the
start of my email address. Because of this I then decided to create a new Gmail
account for my artist thechrismallette.gmail.com which then meant that the
published web address would include his name and it would make it look more
like an official site without me having to pay to upgrade.


The first thing
I change on my Wix website was the names of the pages. I decided to call the
page that contained information about the artist the ‘About Me’ page and I
added the ‘Store’ page. I thought creating a store for my artist’s website would make it look a lot more realistic.


Following this I then started editing
the ‘About Me’ page as I thought it was the easiest one to start with. I
created a life story for my artist which is similar to the kind of thing you
see on a Wikipedia page. Whilst writing this information up I took a break to
research the record label that my artist could be signed to and after looking at
various websites such as Universal Music Group, Mercury, Island, Sony, Polydor,
Atlantic and Warner Music Group I decided Chris Mallette would be signed to
Atlantic Records, a subsidiary label of Warner Brothers. I made this
decision for a number of different reasons.
- Atlantic have some huge artists signed to wither the UK or US label such as Plan B, Cody Simpson, TreySongz, Fun, Flo Rida, Marina and the Diamonds, Paramore, Bruno Mars to name a few. A few of artists they have signed would fall under the genre of indie which would therefore mean they would hypothetically know how to work with Mallette. This would work in Mallette's favour as they would have a lot of contacts and could allow him to hit the big time quicker.
- Atlantic are a well known and renowned record label that have been a subsidiary of the major record label, Warner Music Group since 1967.
- Atlantic have a range of successful UK artists signed with them such as Plan B, Marina and the Diamonds, Ed Sheeran, Rudimental, Birdy, Delilah and more. Some of these artists such as Ed Sheeran have had a lot of success in Europe and have also made it to the US. For a young artist like Mallette with a label that could potentially give him that same support is a good place to be.
- Atlantic have other young stars signed up with them such as 16 year old Australian Cody Simpson. Cody left Australia with his family as a young teen and moved to LA to pursue his music career. In the last few years he has become very popular in the US amongst teenage girls and since he supported Justin Bieber on the UK and European leg of his Believe tour, Cody has gained popularity over here too. The label will know how to deal with teenage boys from their experience with Cody and although Mallette is a year or so older, he will still behave like a teenager. This experience could be useful. Cody is not only a performer but he is a musician and songwriter too like Mallette and in the past week he has released a new video for his latest single. When I watched this I noticed a lot of similarities with my music video. The song is called 'Awake All Night' and is a black and white video. Here are some of the camera shots that I noticed are very similar to my video:

Fueled by Ramen are a New York based company and brand who I also researched and decided he would have a deal with them too because of the success he was having with Atlantic. I also wrote on my website that he was originally signed to the independent record label XL Recordings who have a history with Adele and Vampire Weekend amongst others. To find out all of this information on the institutions Mallette would best suite, I looked at a lot of their official websites.
The second half of the ‘About Me’ page was inspired specifically by the JLS website that I had been looking at. They include a fact page about the four members of the band and I really liked this idea and used it for my own website.

The home page
took a long time to do as there are lots of different aspects to it. The first
thing I did on the homepage was the latest news section because that was just a
case of editing text boxes that were already there and writing what I wanted it
to say.

I also added a Twitter feed to the page. I had decided that I wanted to
make the artist as real as possible so I created a Twitter account for Chris
Mallette which I could then link up to the website. This was easy to do because
I just had to log into the twitter account and copy the web address into the
setting box. I have been tweeting from the account from my iPhone. In the
Twitter app that I have for my own account, there is an option to add more
accounts. I added the Chris Mallette account to this and it keeps both accounts
logged in which means with a click of a button I can change from my account to
his account and back again. The account doesn’t have many followers but I still
thought it was something different to add to my website and keep it up to date
with how the music industry works now.


It was then just a case of creating an order of where he would be playing and editing the existing texts boxes that were down the side of the page, adding more so that I could create a full tour. I then hyperlinked the ‘Buy tickets’ up to the homepage of Ticketmaster. I copied the first few tour dates onto the homepage so that everybody would see there was an upcoming tour and that they would either click on the ‘Buy tickets’ link there or go onto the ‘Tour Dates’ page to find out more.

The 'Store' was made by using the website spread shirt. This website allowed me to choose the product that I wanted to make, upload my own images and add text.

When the product was as I wanted it to be I then screen shot the page and copied it into Microsoft PowerPoint. In PowerPoint I was able to crop the image so that it was just the product left and I then saved the cropped image as a JPEG which I could then upload onto my website using the store manager.

The good thing about spread shirt was as you added different things to the design the price of your product totalled up at the bottom. I was able to use this information when I was editing in the store manager and create a reasonable price for my product. The price was only available in dollars so this meant I had to convert the internet price from spread shirts into dollars. In the store manager I was also able to add information such as what colours the products would be available, the sizes and how they should be washed. I tried to create a store similar to those on existing artist websites.

The ‘Contact’
page involved more research into a management company the Chris Mallette could
be with. Initially I did a Google search of UK music management companies but
didn’t get any useful hits. I then researched Modest! Management, a company
that I am aware of and they are very successful. Most of the artists they work
with have been involved in The X Factor but they do manage other artists too
such as Scouting For Girls. Their biggest asset is One Direction along with
Olly Murs, JLS and Little Mix to name just a few. I thought Modest! would be a
great management company for Mallette as they are used to working with new
artists who are trying to make it in the industry and they have helped create
some huge stars and had success in the US. It would be a good starting point
for Mallette.

I used the Modest! address as the place where fans could send fan
mail to which can be seen in the image above and I also linked up the page to Mallette’s Facebook and Twitter pages.
I made the Facebook page using my own Facebook account and I just created a new
page. This meant that all the notifications from the page would be sent to my
own Facebook so I would be able to manage it.

I noticed an advertisement on
Facebook though which was for an app which allowed you to manage you Facebook
page without it affecting your own account. This became very useful as it
stopped sending the notifications to my own account and sent them through the
app instead, it allowed mine and his accounts to be separate which was ideal as
it isn’t a real account.
 After I had added the social networking to the website
I wrote a little message from Chris Mallette which explained how his fans could
get in touch with him.
After I had added the social networking to the website
I wrote a little message from Chris Mallette which explained how his fans could
get in touch with him.
My favourite part of making the website was
the ‘Gallery’ page. All of the images on that page are uploaded from my own
computer using the image up loader. This allowed me to select the images I
wanted to use; create a title for the image and write in a description box
about what is going on in the photograph. The order of the images could be
changed by selecting them and dragging them into the place where you wanted
them to be.

 I also added an app to this page, Instagram. This was done in the
app shop but it was one of the free apps. I used my iPhone to create a page for
Chris Mallette and this was fun to use when we were filming. Once the app was
on the gallery page I was able to hyperlink it to the page I had created and
this wold be updated link the Twitter feed every time a new photo was added.
Most, if not all artists have a smartphone and with this an Instagram page. I
thought this was another way of making my website seem like a real artists
website and it makes it more up to date on how the industry is working.
I also added an app to this page, Instagram. This was done in the
app shop but it was one of the free apps. I used my iPhone to create a page for
Chris Mallette and this was fun to use when we were filming. Once the app was
on the gallery page I was able to hyperlink it to the page I had created and
this wold be updated link the Twitter feed every time a new photo was added.
Most, if not all artists have a smartphone and with this an Instagram page. I
thought this was another way of making my website seem like a real artists
website and it makes it more up to date on how the industry is working.


The ‘Music’ page
was the last page that I completed along with adding the final touches to the
‘Homepage’. On the original template for
the website, there were a lot of spaces filled with clips from SoundCloud. This
is something I have never used before. I decided to create an account for Chris
Mallette after downloading the app onto my phone but when I searched for
artists that used it, I found that there weren’t many regular star users. This
allowed me to make the decision that I wouldn’t use SoundCloud on my website.
Instead of this I decided to add more YouTube videos to my page as this is a convention of artist websites that I had discovered whilst planning my website, there are a lot of videos involved. I asked my brother one afternoon if he would let me film him messing around on his guitar. I used my iPhone to film him and then uploaded the videos onto YouTube straight from my phone using the Capture app. This was an easy process and then from YouTube I just copied the web address onto my website in the video editing up loader. I thought this was a good way to display more of Mallette’s music. Below is one of the videos we filmed:
The last thing I added to the ‘Music’ page was the final edit of my music video. The ‘Homepage’ was the same but before this I changed the image of the woman at the top of the page to my artist. I used the image editor to make the image black and white to tie in with the rest of the theme.

Also once I had finished my magazine advert I had added the iTunes download logo onto the album cover image. I then saved this as a JPEG and after I had cropped the image in PowerPoint I was able to upload this image onto my website to advertise the release of the album on my website too. I hyperlinked this icon up to iTunes where the album would be downloaded from. I then added the final music video to my website.

During the
initial stages of planning I used the website Prezi to create mind maps of my
ideas. I found this a useful because I could add images, video and text to the
Prezis to make it very visual and have all the website links on there so all of
the information I had looked at was in one place and easy to see on one screen.
Below is a Prezi that I created when I first started my coursework when I was researching the different types of music video:
I also used GoAnimate to express my feelings and ideas. Throughout the year I have been suffering with migraines and have missed a few weeks of college so I found GoAnimate a good way to discuss with myself what steps I was going to take to get my work done on time. I also used it to show a conversation with a teacher or peer if I thought it would be useful to have on my blog.
I made this GoAnimate when I was still creating my Beyoncé video. I had a new idea of how I could film a lip syncing shot and I decided to make the video so the idea would stick in my mind and I could show Hannah (my artist) what I wanted her to do.
New idea for lip sync location by Jennn Wilson on GoAnimate
Video Maker - Powered by GoAnimate. The good thing about Prezi and GoAnimate is that the projects that are created can be embedded onto Blogger.